1. var bob = new Person();
2. bob.sayHello();
3. bob.wave();
##################################################################################################################
Get started with Full Stack Serverless C# - Blazor + Azure Functions
How to build a simple fully serverless CRUD application in C# on Azure
##################################################################################################################
4. var cup = new Coffee();
5. bob.drink(cup);
6. var cupTwo = new Coffee();
I’ve spoken previously about how you can create full stack serverless applications that cost vastly less money than conventional apps as well as scaling much better. This approach is good, but can be a bit tricky for C# houses to implement (which is quite common for Microsoft Azure users). This is because it requires you to build a frontend app that can be deployed as HTML, JS & CSS - which generally means a javascript app using something like React, Angular or Vue. This has a learning overhead if your developer team is used to developing conventional ASP.NET applications in C#, because they need to learn a whole new language, framework and build stack. Luckily there is another option - Blazor
What is Blazor?
Blazor is a new part of ASP.NET that lets you develop apps in C# (I believe you can use F# too with Bolero) that are compiled into a new format of code called WebAssembly. WebAssembly is a fascinating topic in itself that I could bore anyone about endlessly, but the gist of this is that you can build a C# that runs entirely natively in the browser. You can host this on a storage service, or any web server, regardless of backend technology.
I’m very familiar with using React with Typescript and Blazor feels quite different. Blazor has a strong Object-Oriented focus compared to React with it’s more functional style. Given that React started OO and found a lot of issues with that, I’d be interested to see how Blazor develops over time.
Solution Walkthrough
First of all, head here and clone the solution from GitHub.
The solution consists of three projects, Frontend, Common & Backend. Frontend is a Blazor App, Backend is a C# Function App and Common is mostly type definitions to be shared between them. Note that in a ‘real’ solution you’d want corresponding unit test projects etc as well. If you open up the solution in Visual Studio you should see something like this:
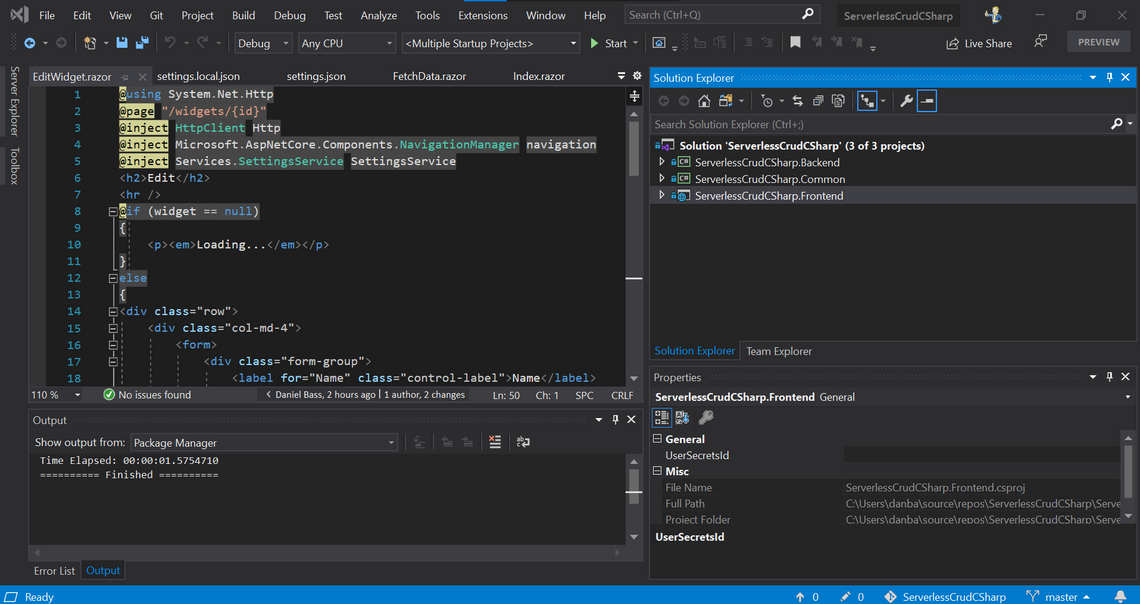
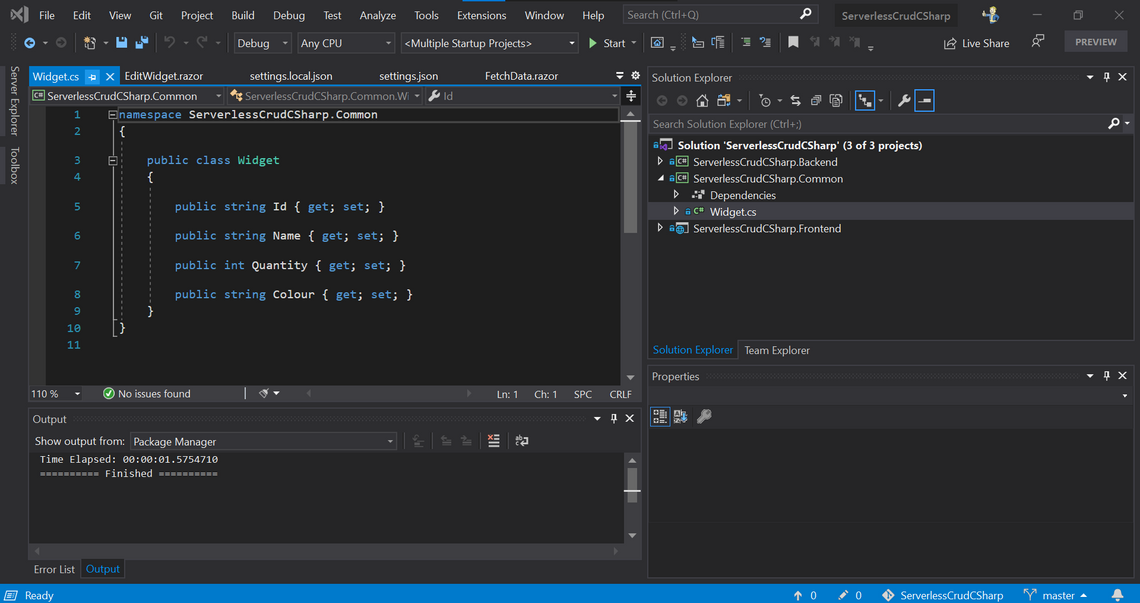
This application is a CRUD app that lets you manage ‘Widgets’. If you go to the Common project, you can see the ‘Widget’ class definition:
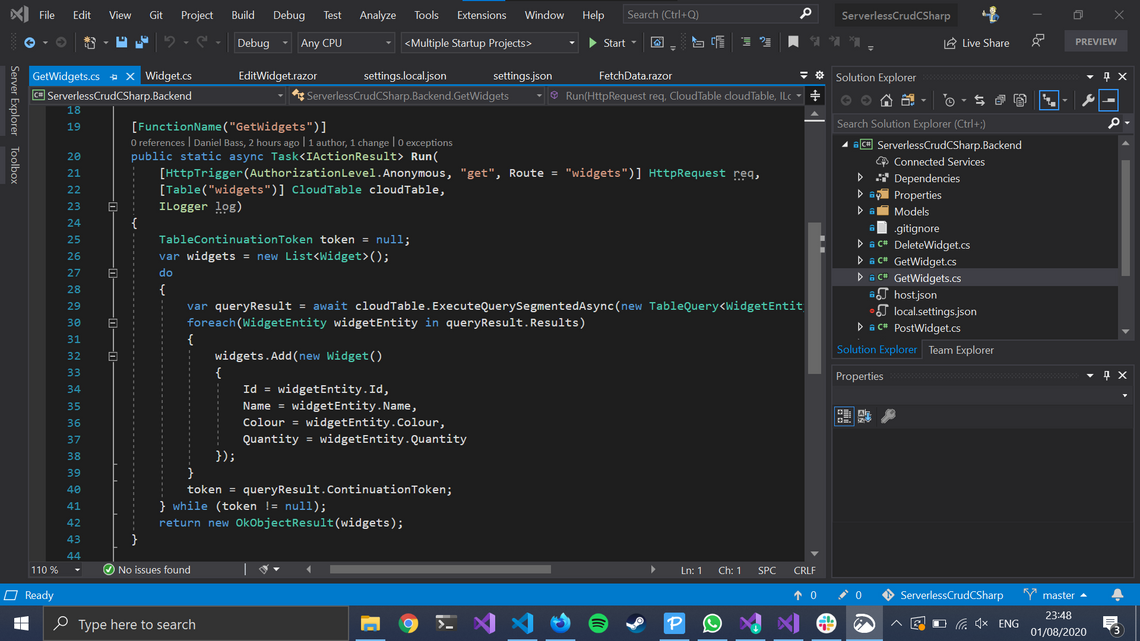
If you go to the Backend project you can see some imaginatively named functions, with a function per verb (this is relatively standard practise). I’ve used the Table Storage input binding in here to allow the functions to concisely create, read, update and delete Widget’s in a backing table in Azure Table Storage. The following GetWidgets method shows this in action, with the input binding simply injecting the client that I then use to execute the query with:
Moving over to the Frontend project, in the FetchData.razor file you can see Blazor in action. At the top of the file we have ‘inject’ statements. The SettingsService one is particularly relevant and I will explore it later.
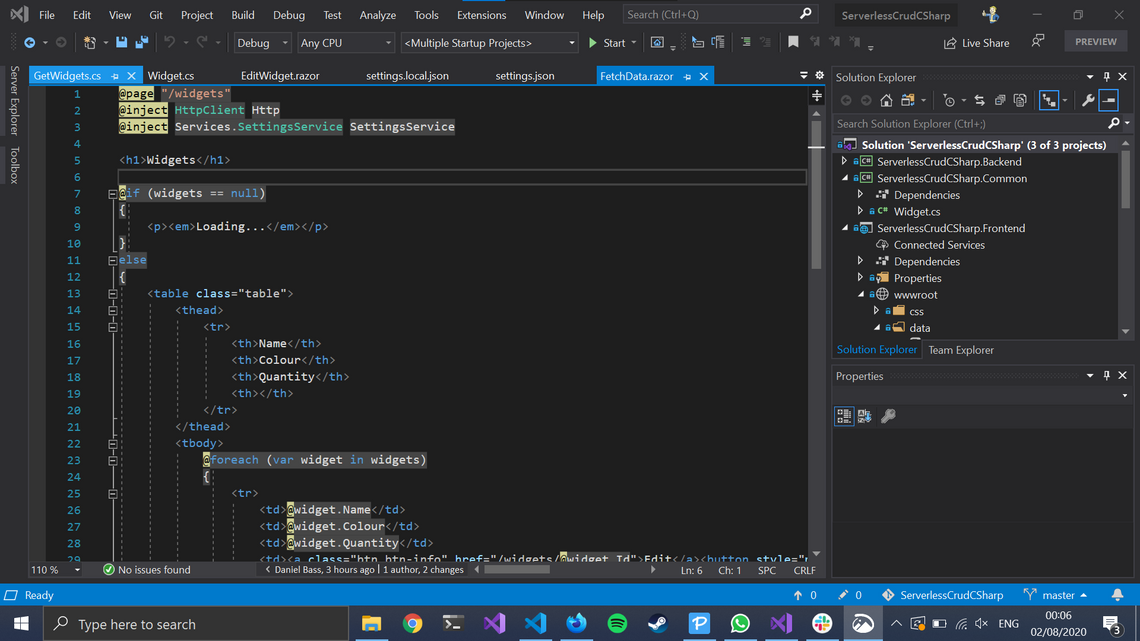
You then have code that defines what HTML is rendered on the screen, which depends on data held below in the code section. In the code section you effectively define a local object that defines that component. You can then use the objects injected at the top of the file to perform operations in this objects own functions. This includes specially named functions which are related to the lifecycle of the component. These are very useful for retrieving data as soon as the component is loaded, for example I am using the OnInitializedAsync method to trigger a call to the GetWidgets function from earlier to get data to fill the table of this component:
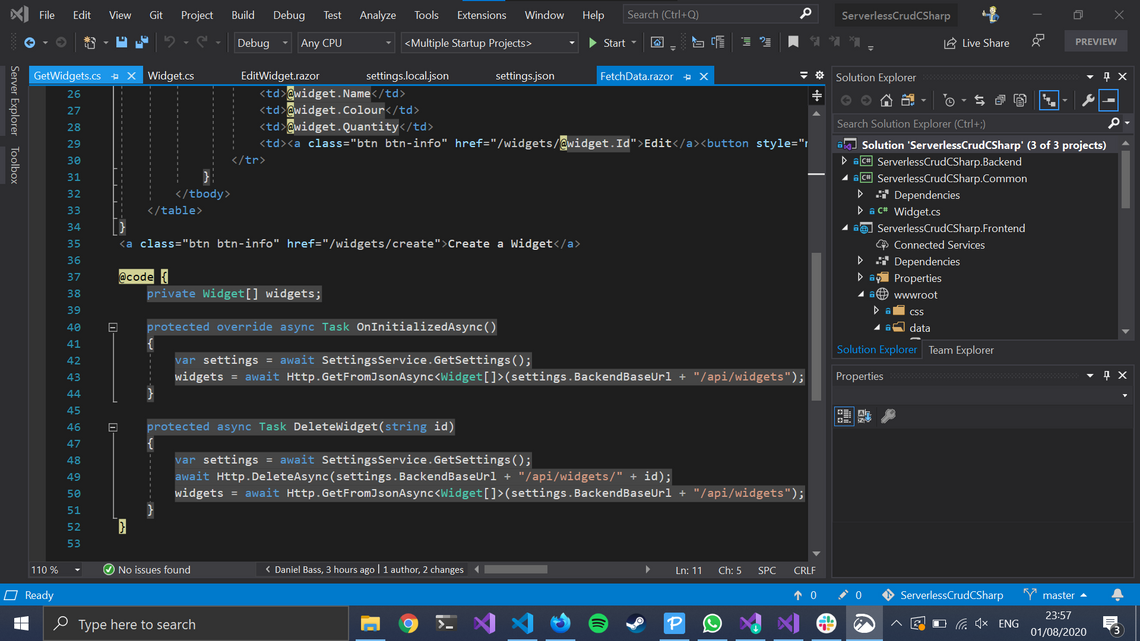
You can also create your on methods and register them to interactions in the UI. In this example, you can see that the click of a button will execute the DeleteWidget method for that widget’s Id:

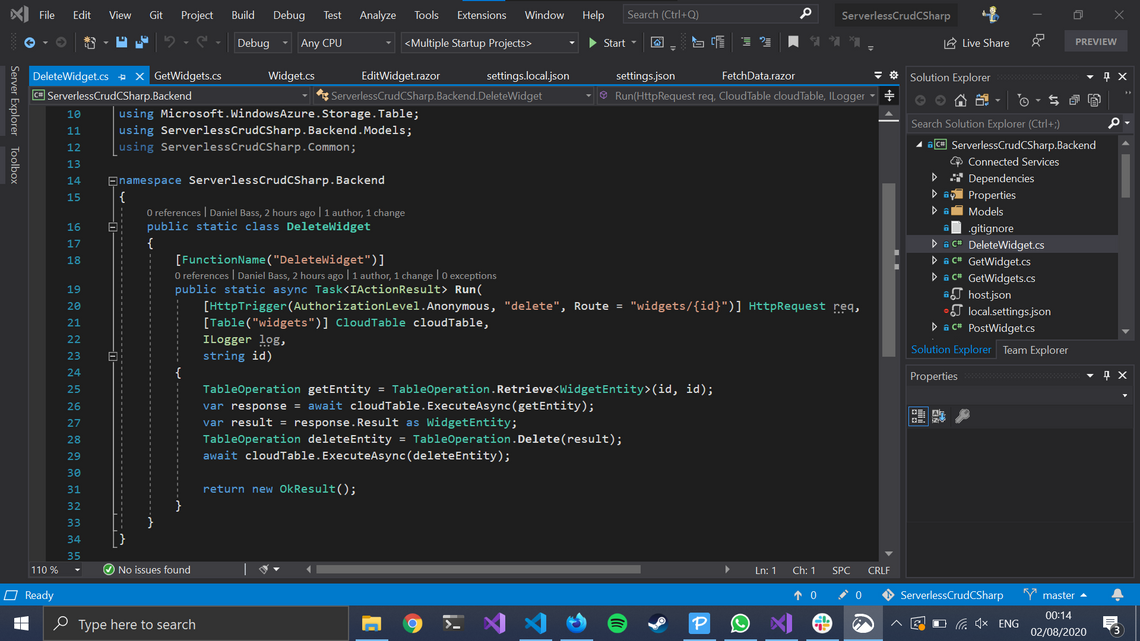
The DeleteWidget method then calls widgets/{id} with a DELETE verb which triggers the DeleteWidget.cs Azure Function. Note the routing logic in the function signature and you can see how this works:
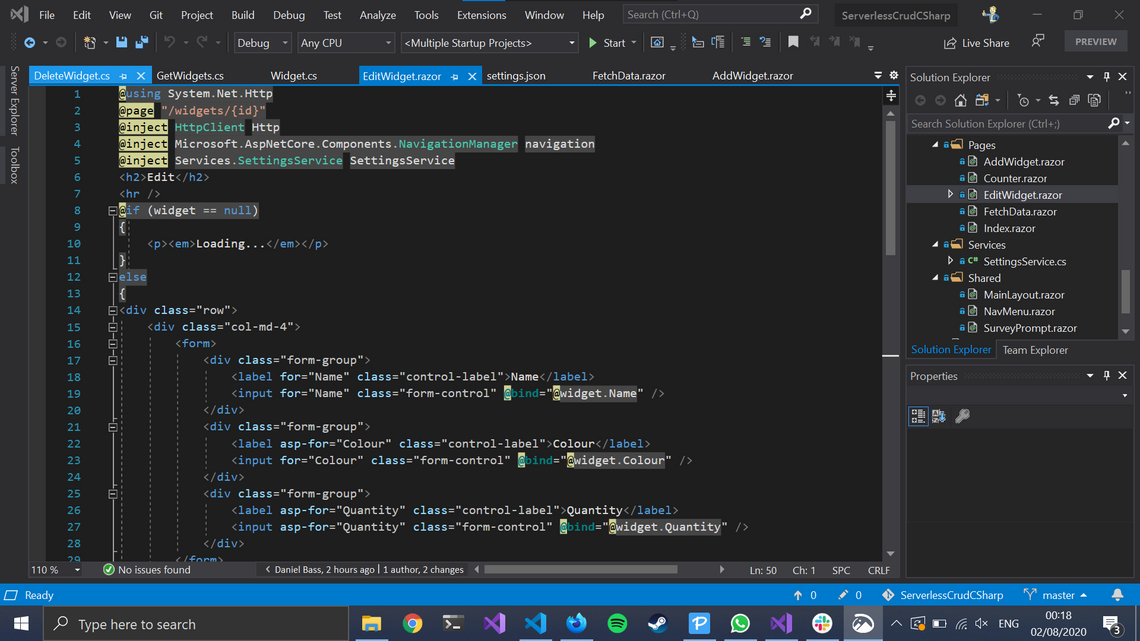
You can also Create and Edit widgets. The EditWidget.razor page in the FrontEnd project shows how you can route your pages dynamically. I’ve defined @page with a standard ASP.NET routing string, with an id in curly braces:
This is pretty cool, as you can then simply take that in as a parameter into your object in the code section below by naming a property the same and decorating it ‘Parameter’:
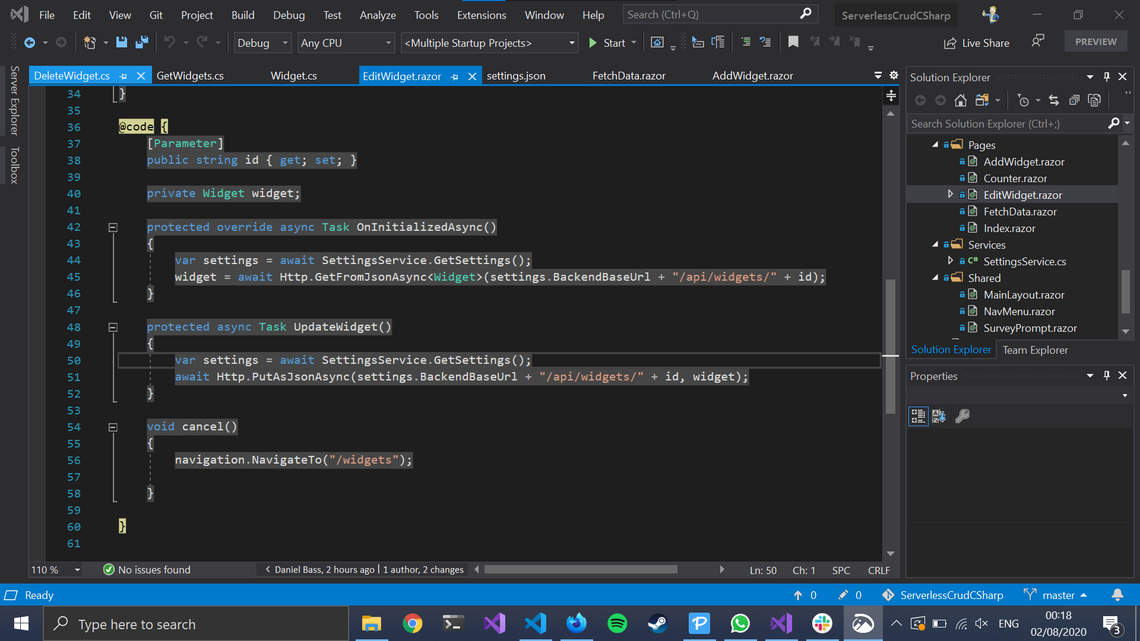
With that Id, I then hit the Azure Function GetWidget method and retrieve that individual Widget’s details for editing. This is not the most efficient approach - I already have the array of widgets in memory for the display page so I could save myself some network latency there. This approach guarantees that the data isn’t stale though, and also makes use of each of the standard CRUD operations for demonstration purposes.
Another interesting thing about this is the @bind syntax that is used. This is to bind whatever is currently in the input boxes of a form to your object. Again this is a practise that React looked at and decided against due to the confusion that can happen in large projects, so I’d be interested to see how that progresses.
The Create page is basically the same, but feel free to check it out.
You’ll notice that I’ve set up Visual Studio to automatically launch both the frontend and backend when you click debug. When you try and do it, it won’t work immediately because you don’t have any local settings for your Azure Function to tell it what database to connect to. See the below local.settings.json file and feel free to copy and paste it into your Backend project at the root level:
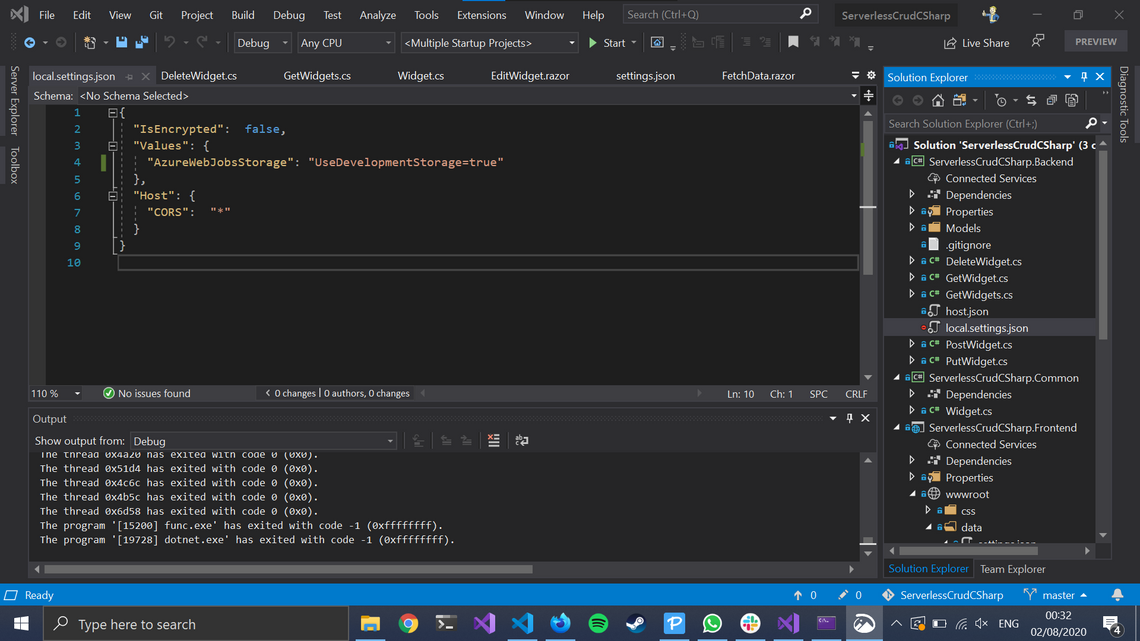
{
"IsEncrypted": false,
"Values": {
"AzureWebJobsStorage": "UseDevelopmentStorage=true"
},
"Host": {
"CORS": "*"
}
}
These settings tell Azure Functions two things. Firstly it says to use the local Azure Storage emulator to simulate the Table Storage database locally. Secondly it tells it to accept a cross site request from anywhere - this is fine for local development but very much not ok when deployed to the cloud - I’ll show you how we get around that.
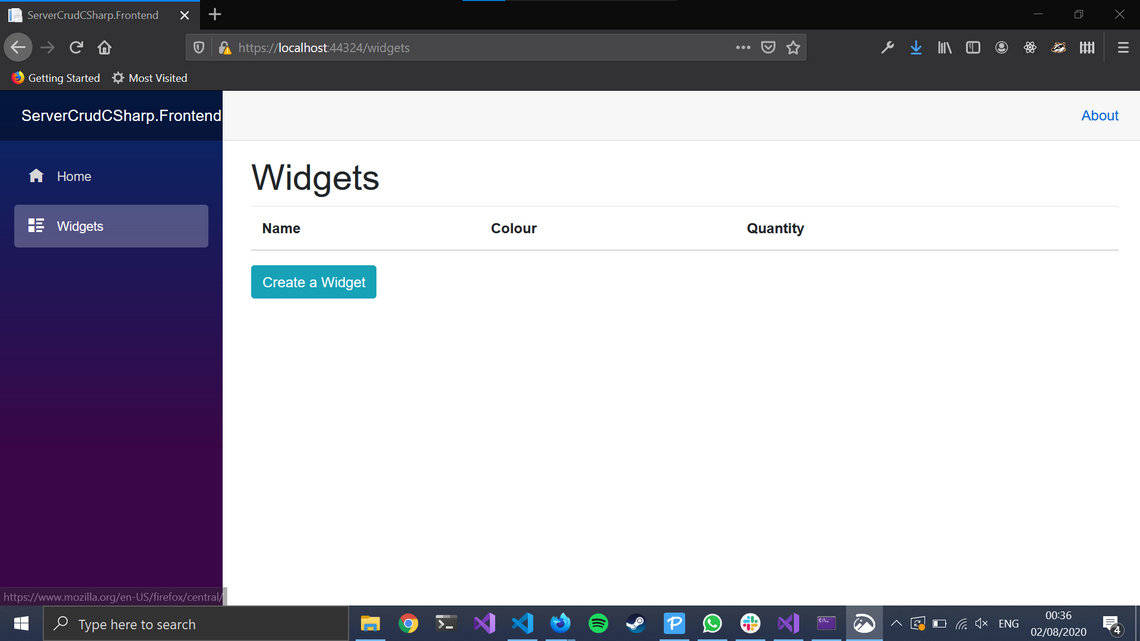
With this added you can hit debug and your solution will spin up. You should be able to click on ‘Widgets’ and see the table with no results:
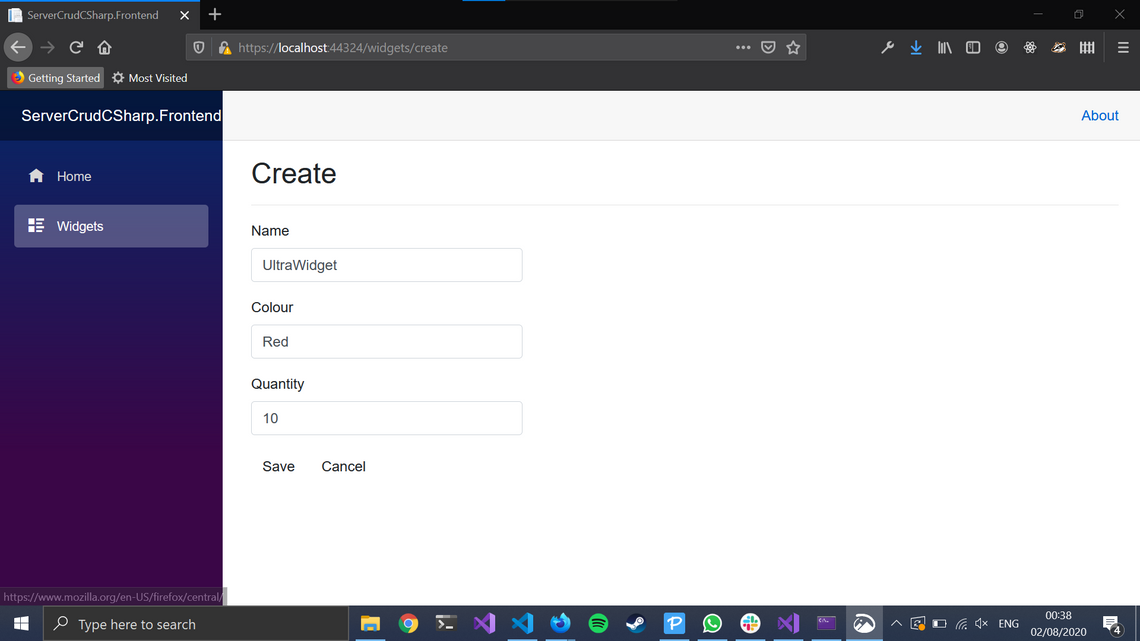
You can click ‘Create a Widget’ and fill in the form:
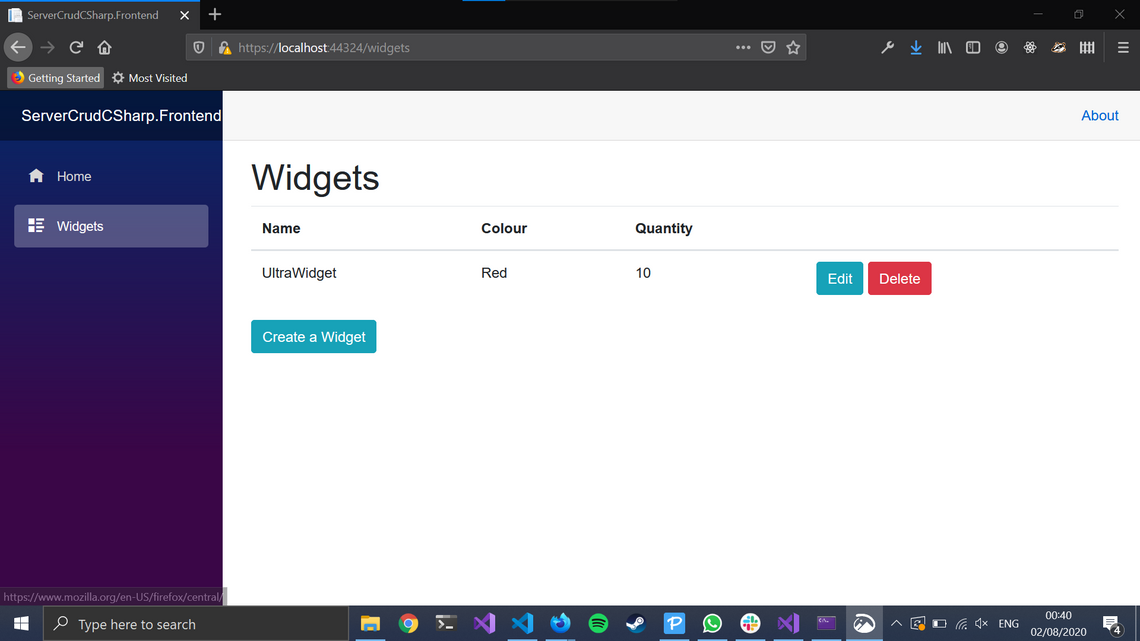
You can then click save, and you’ll be redirected back to the table page where you’ll see your new entry:
You can then edit that widget:
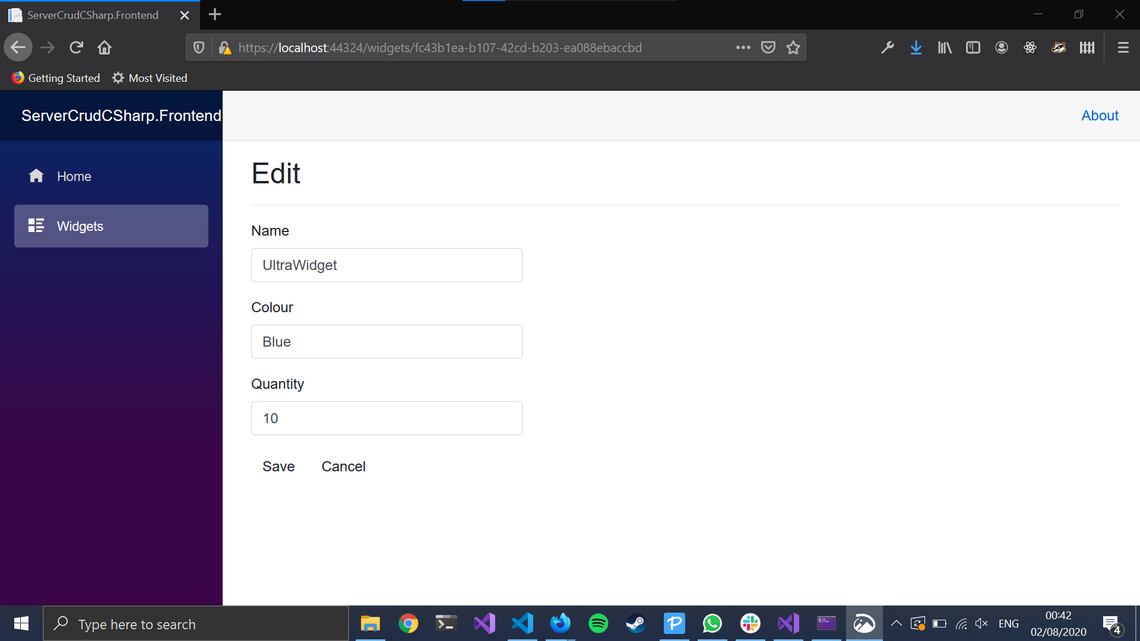
and save the result and see it change in the table:
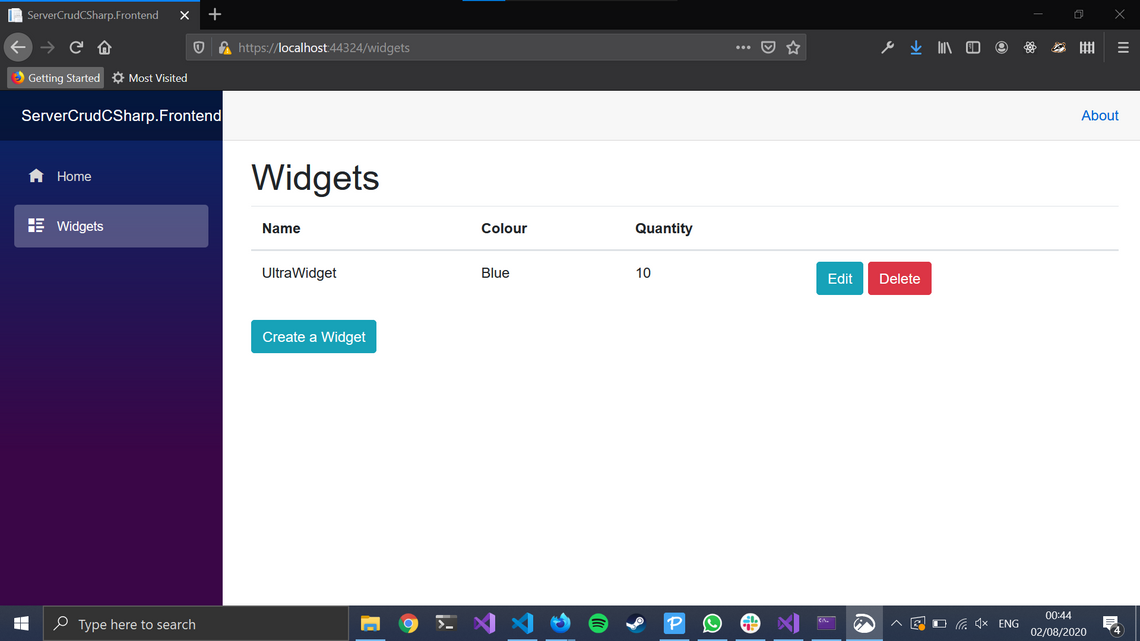
You can then of course delete that widget, and your table will return to empty. Hopefully you can see that this shows a fully functioning CRUD app written entirely in Serverless C# which can take full advantage things detailed in my other articles, like the 98% saving.
Build & Deployment to Azure
This app is built Azure Pipelines, with a yaml file defining the build process in the root directory. It’s not part of the Visual Studio solution so you’ll need a text editor to open it, I’m using VS Code. The gist of this is that we execute a dotnet publish for the backend and frontend project, and publish both in a single artifact for our release pipeline to use:
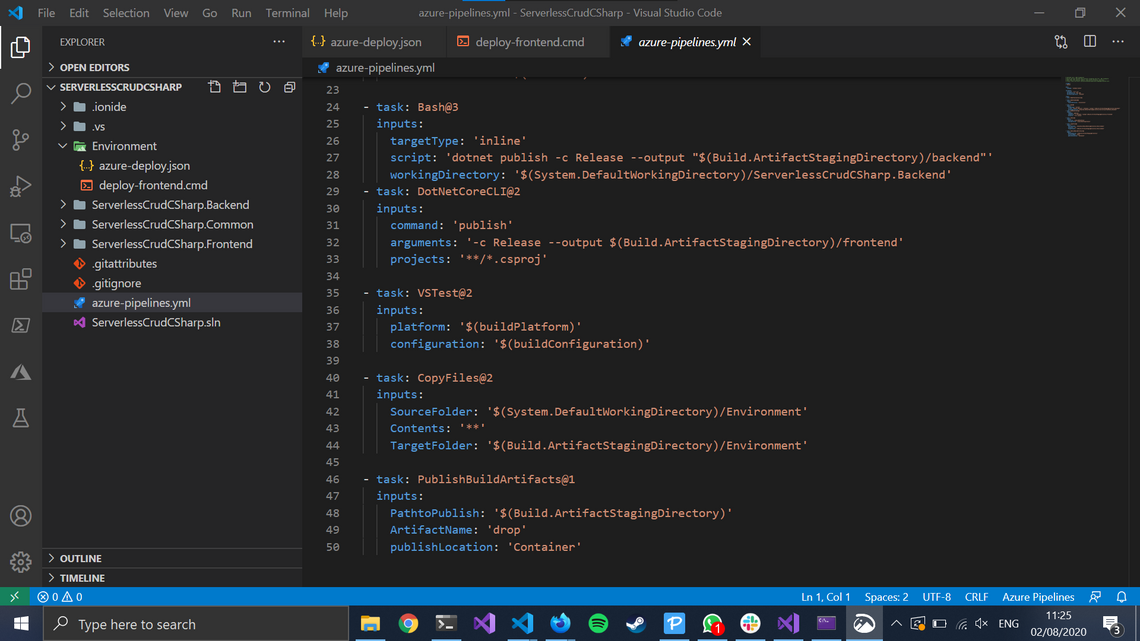
You’ll also see a copy task moving over a folder called ‘Environment’. Open that up in VS Code and you’ll see an azure-deploy.json file and a deploy-frontend.cmd file. The azure-deploy.json file is an ARM template, which is a definition of the infrastructure resources needed to run this solution on the cloud. It defines a storage account with static site hosting switched on, a C# function app, an application insights resource and the associated settings for each. For the function app you can see how I resolve the CORS issue that was solved by the local.settings.json earlier:
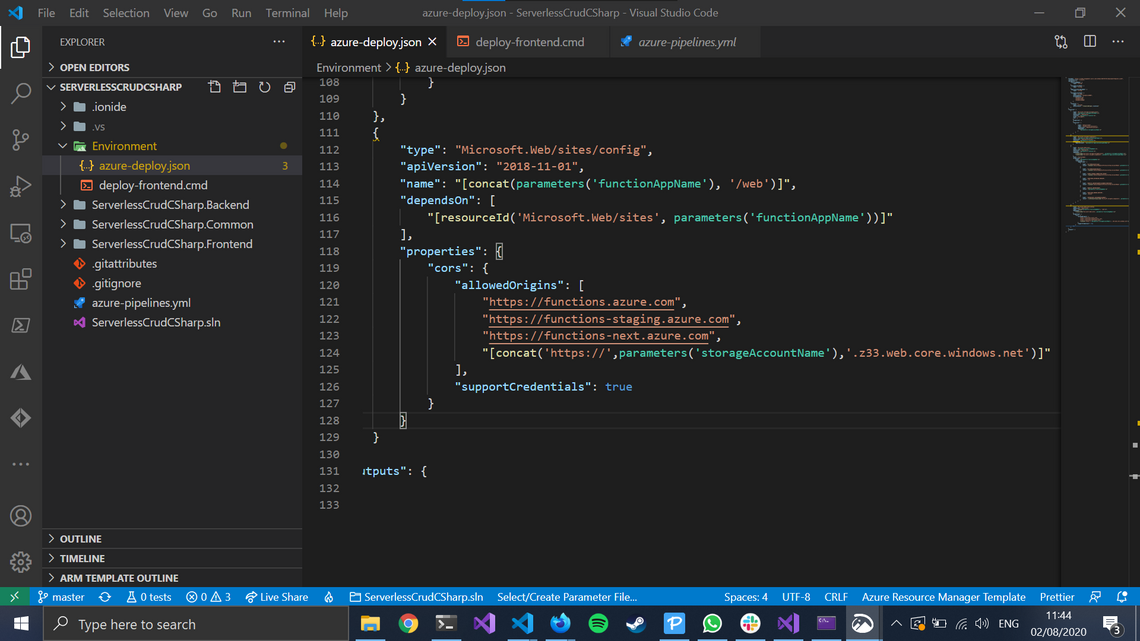
Unfortunately there’s no good automated way of getting that ‘z33’ number which varies per region, so this is a little hardcoded. An extension to this technique would be to host this on a CDN, I’ve shown how to do that in a previous article. That then doesn’t need the z33 bit, which is nice.
Next we’ve got the cmd file - this could be rewritten in powershell etc. It basically uploads the frontend folder to a special container called $web on the storage account and then switches on static site hosting. The home page and 404 page are both set to index.html, as Blazor itself handles routing client-side (if a user tries to request a page that doesn’t exist, the storage account will redirect it to index.html, which will load up the Blazor app which will then attempt to route to the correct page. If you deploy this yourself and try and visit /widgets whilst having your network/console pane open, you will see a 404 error before the page loads. This is that process happening).
Let’s take a look at the release pipeline:
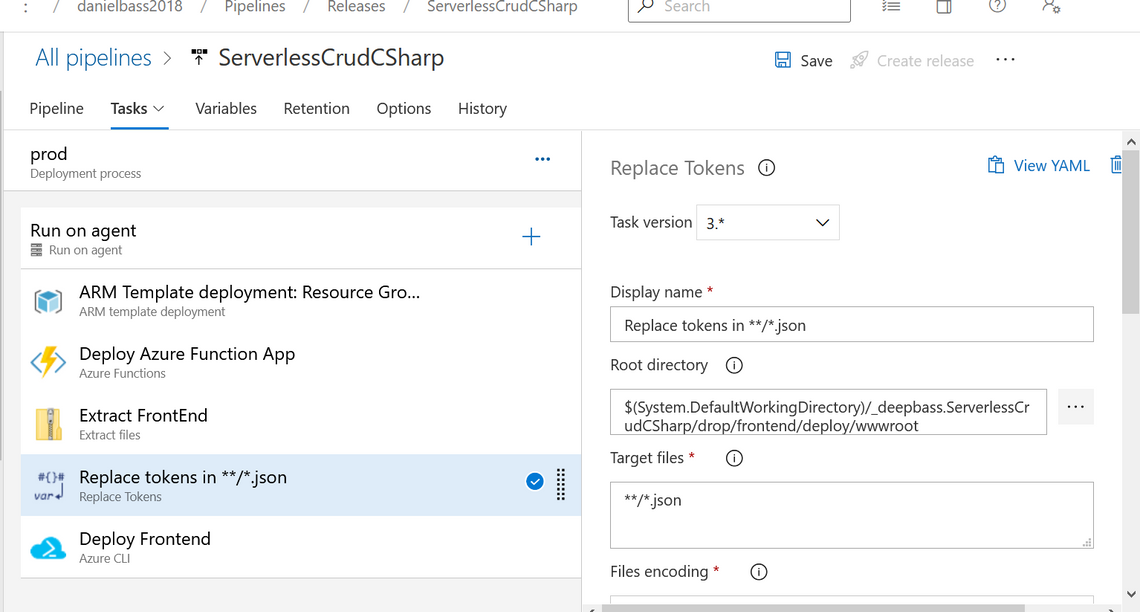
First of all we deploy the ARM template. This checks whether a resource group with the specified resources in the template exists, and if not it will create the difference. This declarative infrastructure is incredibly important for modern DevOps, being much more reliable than bash scripts. Next we deploy the Azure Function, so far so obvious. The next bit gets a bit strange. We extract the front end code from its zip file, replace some tokens in JSON files in there, and then deploy it. What are we replacing in those JSON files?
This is all related to the SettingsService I briefly mentioned above. How does our Blazor app know which backend function app to talk to if they’ve got different domains? Usually for this problem you use something like environment variables - per environment you set some setting on a server with the address in it. You can’t do that in a client-hosted application - the app runs in their browser not your server. If you go back to the Visual Studio solution you can see the little bit of DevOps trickery I’ve employed to make this work. If you open up the SettingsService, it should look like this:
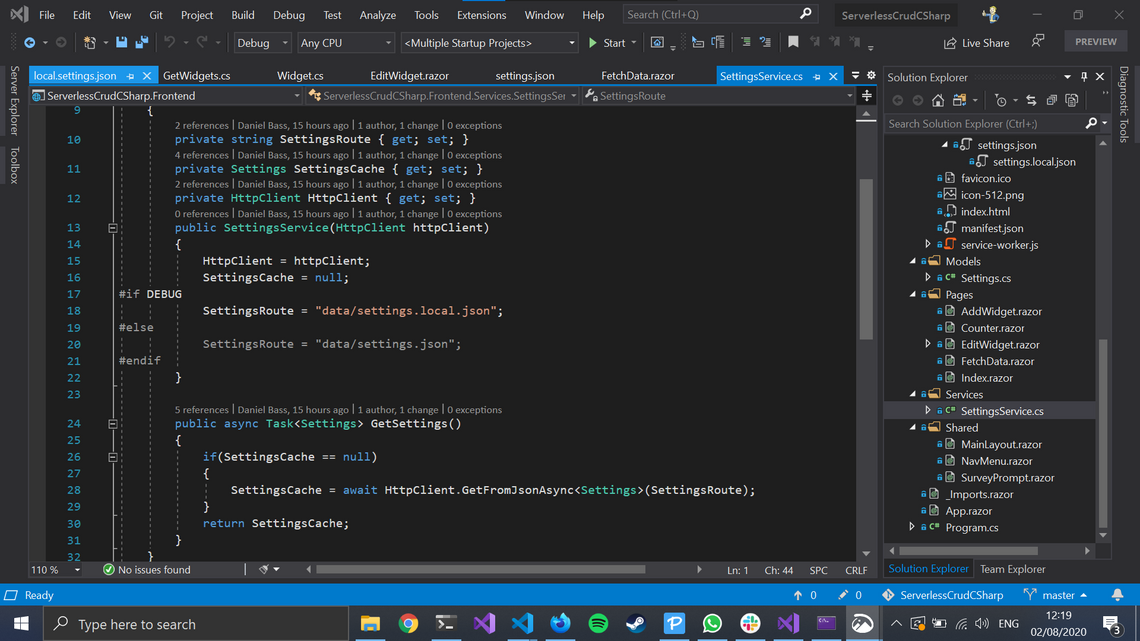
In here you can see that I’ve used conditional compilation to change which settings file Blazor looks at to find the endpoint to use. If it is a debug configuration (i.e. locally), it will fetch the json file held locally at data/settings.local.json. Otherwise it will go to data/settings.json. Let’s take a look at those files to see what’s going on:
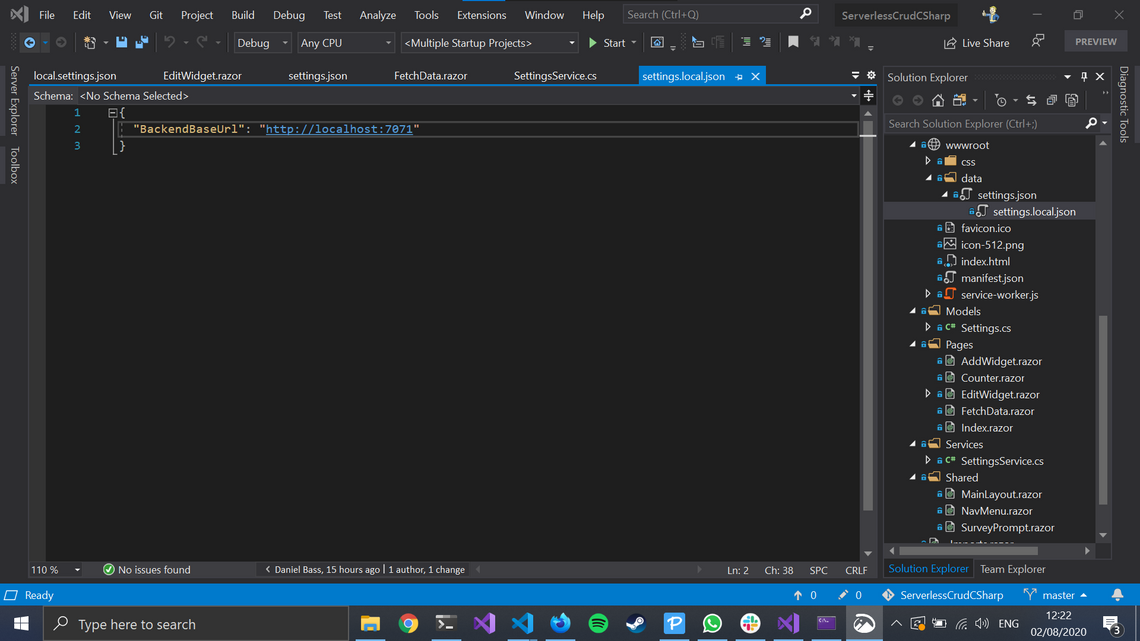
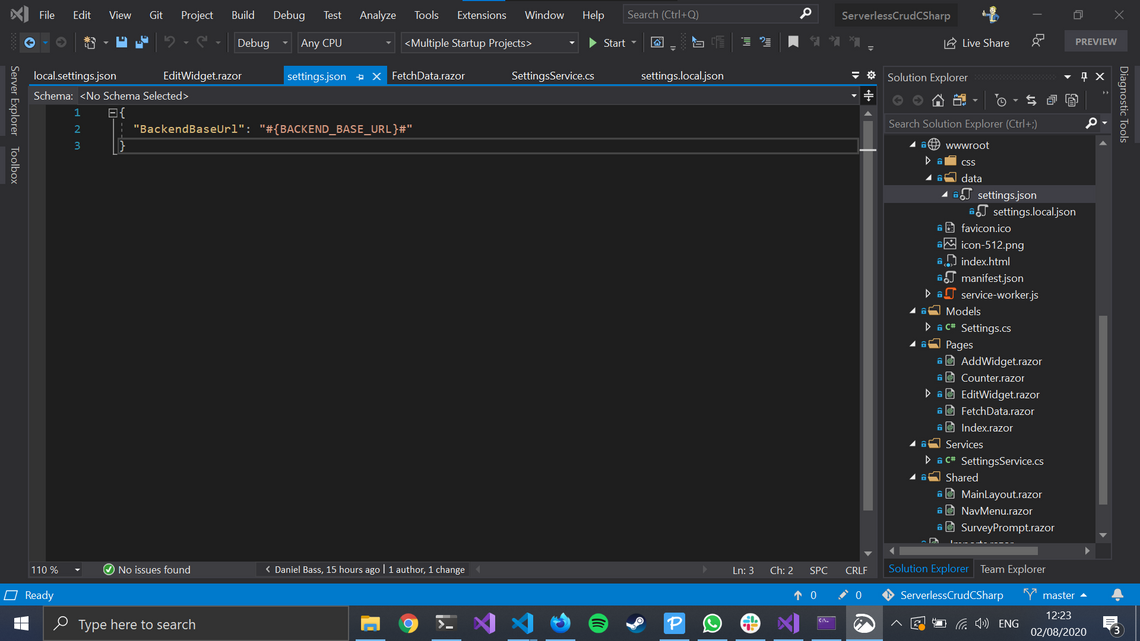
First of all you’ll notice these files are held in the special wwwroot area. This means they are deployed as is to the webserver directly. The local.settings.json has the setting pointing to http://localhost:7071, which is the standard address for an Azure Function running locally. This means that when you hit debug in Visual Studio, the Blazor App knows to look at your local Azure Function by default. If you wanted to, you could easily change that to point at your deployed Azure Function so you can test it out.
When the release build is configured, it instead chooses the broken-looking settings.json. Instead of a url, we’ve got #{BACKEND_BASE_URL}#. This is the pattern which lets the replace token task on the release pipeline inject the actual address of the deployed Azure Function per environment. This way you can have as many environments as you like, with each one getting it’s backend url injected here.
There’s two other things of note in this area. Firstly you can see that the SettingsService maintains a local cache of the object. This is important to improve latency - lots of parts of this app need the backend url and it would seriously impact performance if they had to do an extra request each time.
The other thing is the injection of this SettingsService so that components and pages can use it. If you visit Program.cs, you can see how this works:
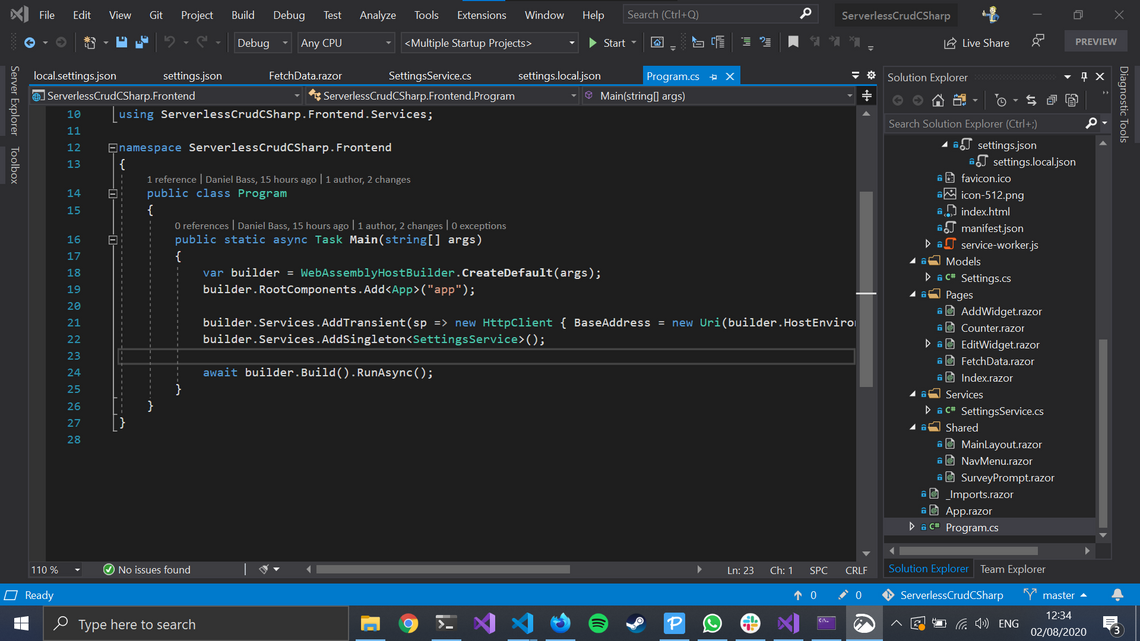
We’re adding a Singleton of SettingsService. We want singleton because we want all instances to use that internal cache to reduce the number of network requests. This is now available to all pages and components using the @Inject syntax.
The Result
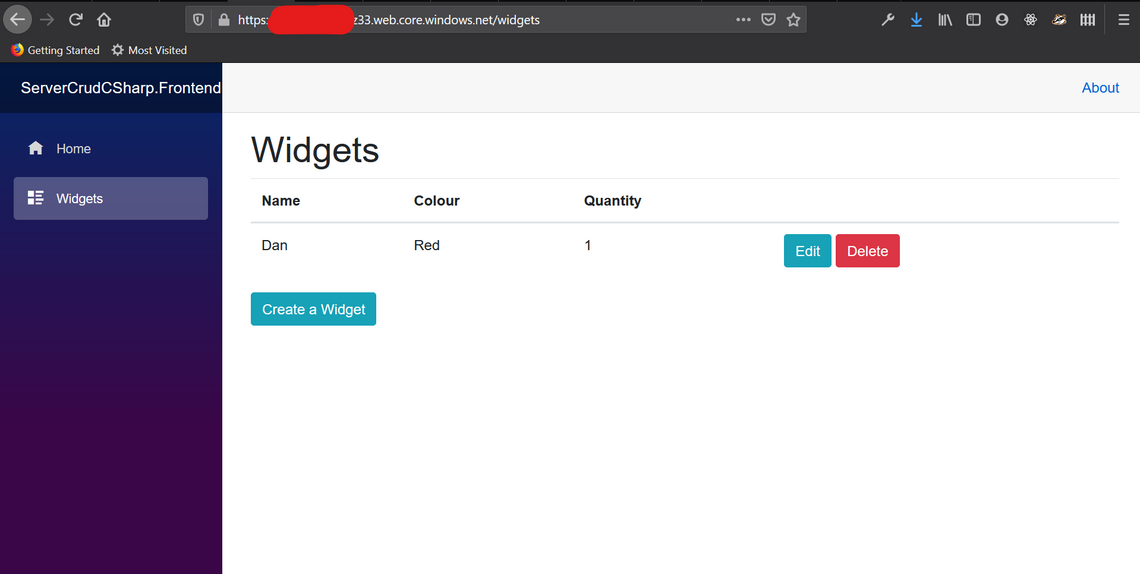
Now we have a full stack serverless CRUD app using solely C# code. We’re sharing types between the frontend and backend, which makes compatibility nice and easy. The app is deployed to a storage account, with an incredibly small hosting bill.
What’s missing?
Mostly three things, global distribution, observability and security.
The frontend app can be deployed to a CDN to improve it’s loading time for users across the world, and the Azure Function can be deployed globally using my technique. I’ll follow up with a later article to show how you can use Cosmos DB to get this app working with great latency from across the globe.
The Azure Function comes with App Insights wired up automatically, but to deploy this app to a production environment, you’ll want to wire up the Blazor app too and take advantage of App Insights built in distributed tracing.
On the security front, currently your Azure Function is open to anyone on the internet to mess about with and enter in widgets to your database. This is obviously not ideal. In a follow-up article I’ll show you how to utilize Azure Active Directory to implement access control on your application, both in the frontend and backend.
What other problems are there?
Blazor itself may have just got a GA release, giving it full support, but it has a long way to go to be as much of a contender as React or other established front end frameworks. Its community is currently miniscule in comparison to the others, with few frontend focused C# libraries. Whilst WebAssembly is a truly fascinating technology, the fact remains that you currently need to ship 6mb to the clients browser before your app begins to load. This is mostly because you need to ship the dotnet runtime. For office workers on super fast wifi that may not be an issue, but someone on an antiquated android on 3G is going to suffer a much worse service than something programmed in Gatsby for example. There are far more of those users than you’d think in the real world.
Conclusion
Whilst there are problems with this approach, as detailed above, they are mostly maturity problems with Blazor. I can’t see Blazor going anywhere but up however, as it will enable a lot of C# shops to properly embrace frontend development and deliver better results to their customers. With .NET 5, there will be a significant number of upgrades to Blazor, hopefully including reductions in its package size. This approach lets you get the full benefits of Serverless whilst keeping the efficiency of your development teams using C#.
© 2022 - Built by Daniel Bass